How to Build a Sturdy Workbench: Step-by-Step Guide
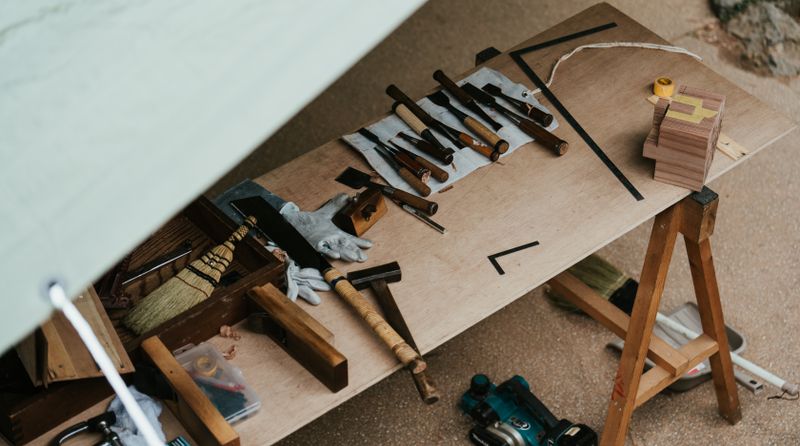
A good workbench is the centerpiece of any woodworking shop. It provides a flat, stable surface for planing, sawing, chiseling, and assembling projects. While you can buy a workbench, building your own gives you exactly what you need — a bench tailored to your height, your work style, and your space. This guide walks you through building a classic cabinetmaker’s workbench using traditional joinery.
Planning Your Workbench
Before you buy materials, consider these key dimensions. A comfortable bench height places the work surface at your wrist height when standing with arms at your sides. For most woodworkers, that is between 33 and 36 inches. The bench should be at least 24 inches deep and 60 to 80 inches long. A heavier bench is more stable — aim for something that weighs at least 150 pounds when assembled.
Choose your wood carefully. Hard maple and beech are traditional choices because they are dense, hard, and resist dents. Southern yellow pine is an excellent budget option that is surprisingly heavy and durable. Avoid construction lumber with excessive knots or warping.
Materials You Will Need
- 8-10 boards of 8/4 hardwood for the top (at least 4-5 inches wide each)
- 4x4 or 6x6 hardwood for legs
- 2x6 or 4x4 stock for stretchers
- 2x8 or 2x10 stock for the shelf
- Wood glue (waterproof)
- Lag bolts or drawbore pins
- Bench vise (face vise and optionally a tail vise)
- Finish (polyurethane, boiled linseed oil, or Rubio Monocoat)
Building the Top
The top is the most important part of your bench. Start by milling your boards flat, straight, and square. A DeWalt DW735X Portable Thickness Planer makes this process fast and consistent. Arrange the boards in a pleasing pattern, alternating end grain direction to minimize warping.
Edge-glue the boards together in sections of three or four, then glue the sections together. Use pipe clamps or parallel clamps to apply even pressure. Wipe away excess glue immediately — dried glue is difficult to remove and will interfere with finishing. Allow the glue to cure for at least 24 hours.
Once the top is glued up, flatten it with a hand plane or a router sled. The surface should be flat within 1/32 inch across its length. Round over the edges slightly with a router to prevent splintering.
Building the Base
The base consists of four legs connected by stretchers using mortise-and-tenon joints. Cut the legs to length, keeping in mind the final bench height minus the top thickness (typically 3 to 4 inches).
Cut mortises in the legs for the short and long stretchers. The tenons on the stretchers should fit snugly — not so tight that you need a mallet to drive them home, but tight enough that they hold without glue during test fitting.
Assemble the two end frames first (two legs connected by two short stretchers), then connect the end frames with the long stretchers. Use drawbore pins or lag bolts to secure the joints. Drawboring creates a mechanical lock that is stronger than glue alone.
Adding the Vise
A face vise mounted on the front left corner of the bench is essential for holding boards edge-up for planing and sawing. Mount the vise according to the manufacturer’s instructions, ensuring the jaw faces are flush with the bench edge. You can also add a tail vise on the right end for holding boards flat using bench dogs.
Drill a row of 3/4-inch dog holes along the front and back of the bench top, spaced about 4 to 6 inches apart. These holes accept bench dogs and holdfasts, giving you a versatile clamping system.
Finishing
Apply three coats of a durable finish to protect the top from glue, finish, and moisture. Boiled linseed oil is a traditional choice that is easy to apply and repair. Polyurethane provides a harder, more protective surface. Whatever you choose, avoid film-building finishes on the top — they can make the surface too smooth for clamping.
Your new workbench will serve as the foundation of your woodworking for decades. Take your time building it, and enjoy the process of creating something truly useful with your own hands.
Workholding Layout Checklist
Plan the vise, dog holes, holdfast holes, and tool tray before you glue up the top. Workholding is much easier to change on paper than after a 150-pound bench is assembled. If you are right-handed, the face vise usually goes on the front left corner so you can plane boards from left to right without bumping into the vise screw. Left-handed woodworkers may prefer the opposite layout.
Keep the first row of dog holes close enough to the front edge that a board can be clamped between a bench dog and a tail vise, but not so close that the holes weaken the edge. A common layout is 3 to 4 inches in from the front edge, with holes spaced 4 to 6 inches apart. Drill a few test holes in scrap the same thickness as your top to confirm your holdfasts grip well before committing to the full pattern.
If you use a tool well or tray, make it removable. A fixed tray collects shavings and dropped screws, while a removable tray can be lifted out for cleaning. Many woodworkers skip the tray entirely and keep the top fully flat for assembly work.
Mistakes to Avoid
The most common workbench mistake is building too light. A bench that slides across the floor every time you plane a board will be frustrating no matter how beautiful it looks. If you are using construction lumber, add a low shelf loaded with tools or lumber offcuts to increase mass.
Do not over-tighten drawbore pins or lag bolts during the first dry fit. Assemble the base, check it for square, then tighten gradually while measuring the diagonals. A base that is out of square will telegraph twist into the top. Finally, leave the bench unfinished for a few days after assembly and use it for actual work. Small adjustments to vise height, edge roundovers, and dog-hole locations are easier before the final coats go on.
First Week Tune-Up
After the first few work sessions, recheck bolts, vise screws, and the top for any high spots. Wood compresses under hardware and benches settle as they are used. A quick tune-up after real work makes the bench feel intentional rather than merely assembled.
Related Articles
Before you build the base, review the guide to essential carpentry hand tools so you have everything you need on hand. The mortise-and-tenon joinery used in a traditional workbench base is related to the techniques covered in the dado and rabbet joints guide. When the bench is complete, setting up proper workshop lighting will make the space safer and more productive for years to come.

The Carpenter's Guide Editorial Team
Independent trade-focused editorial team